Overview #
The Product Entry process in ScopeMatch applies to both the Product Catalog and the Product Supply List. This feature allows you to add new products, define specifications, and manage variations efficiently through the Split function, making it easier to maintain detailed and organized supply data.
With this feature, companies can create single or multiple product records at once, based on selected specifications such as Type, Standard, Material, and Application.
When to Use It #
Use Product Entry when you need to:
- Add multiple product variations at once (e.g. different materials, standards, or sizes).
- Manage large product catalogs efficiently.
- Ensure consistent specification data for suppliers, categories, or HS codes.
- Update supply lists with new or revised product standards.
Step-by-Step Guide #
Step 1: Access the Product Supply Section #
- From the left navigation panel, go to Product Supply and select either:
- Product Catalog, or
- Product Supply List, depending on where you want to add the new products.
- Select which list you want to add a product to.
- Click on Add Product to open the product entry window. (See Screenshot 1 below)
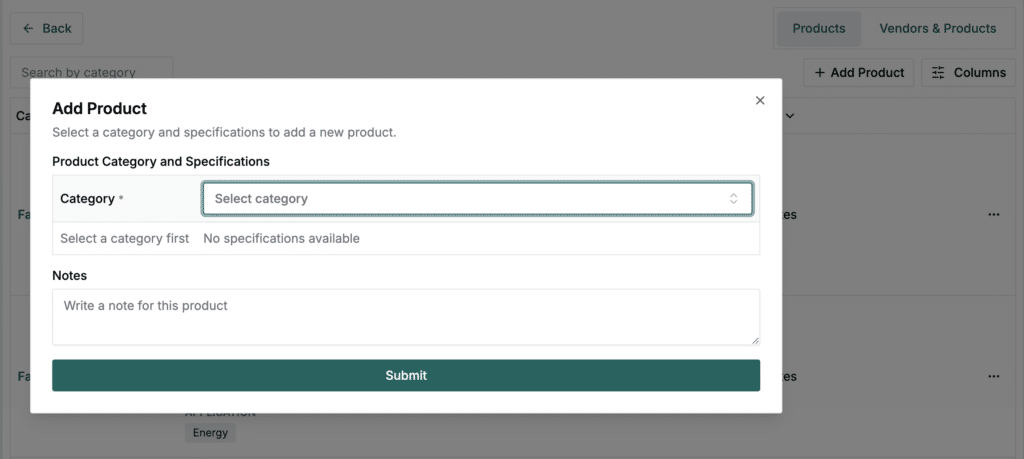
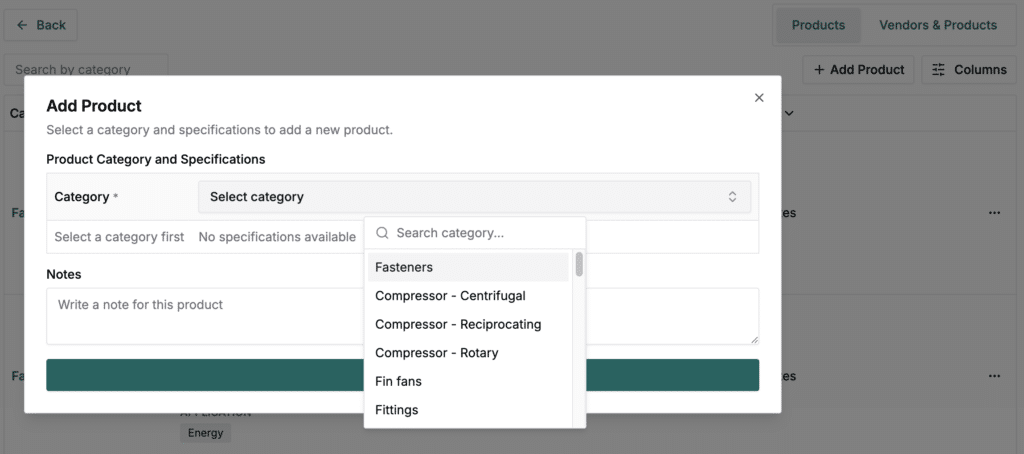
Step 2: Select a Product Category #
Choose the relevant Category (e.g., Fasteners, Pipes, etc.).
This determines which specifications are available for entry. (See Screenshot 2 below)
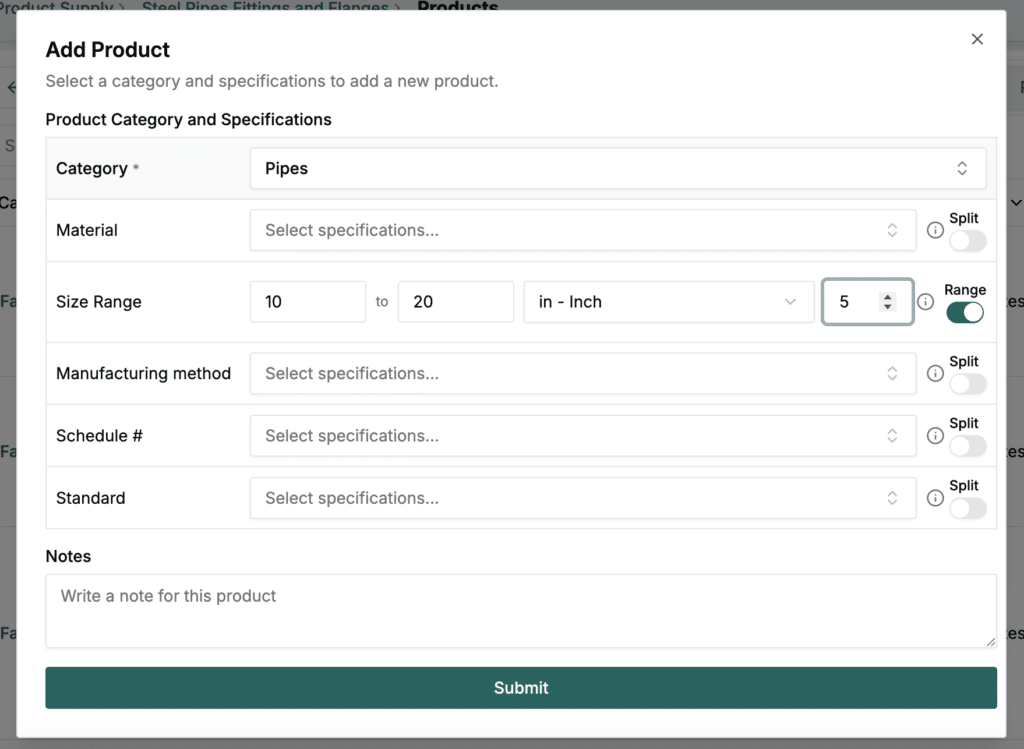
Step 3: Add Specifications #
Define product details such as:
- Type (e.g., Square Head Machined)
- Standard (e.g., ASTM A194, ASTM A307)
- Material (e.g., Stainless Steel, Carbon Steel)
- Application (e.g., Energy)
You can select one or multiple values per field.
Step 4: Use the Split Option #
Next to each specification, toggle Split if you want to create separate product records for each selected value. Use this feature with caution has the number of products can increase exponentially and overload the page.
For example:
If you select ASTM A194 and ASTM A307 and turn on Split, the system will create two separate product entries, one for each standard. (See Screenshot 3 below)

When multiple fields use Split, ScopeMatch generates all possible combinations automatically (e.g., Pipe Carbon Steel Seamless, Pipe Carbon Steel Welded, Pipe Copper Seamless, etc.) among all the specifications values select with the split option toggled on.
Step 5: Add Size or Range #
If the category includes Size Range, you can:
- Enter a single size (e.g., 30 inches), or
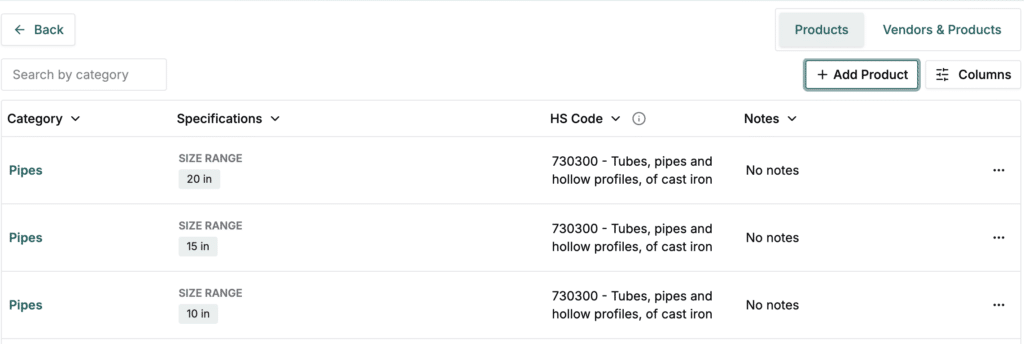
- Set a range (e.g., 10–20 inches) and add a Step value (e.g., 5) to automatically list individual items – 10, 15, and 20 inches (see Screenshot 4 below) if you wish to do so.
Step 6: Add Notes and Submit #
Add any relevant Notes (optional) and click Submit. ScopeMatch will create one or multiple product records based on the Split settings, all visible in the product list with corresponding specifications and HS codes.
- Use Split for mutually exclusive specs (e.g., Seamless + Welded together).
- Leave specification fields empty as this reduces product visibility in searches.
FAQs #
- What does the Split toggle do?
- It automatically creates separate product entries for each selected specification value instead of grouping them into one record.
- Can I use Split on multiple fields?
- Yes. Each active Split multiplies combinations – useful for categories like pipes or fittings with multiple materials and types.
- Can I edit Split products after creation?
- Yes. Each product is created as an independent record that can be updated individually.
Troubleshooting #
- If Split creates too many combinations: Review your selections. Disable Split on one or more fields to reduce entries.
- If products don’t appear after submission: Refresh the Product Supply list or ensure you’ve added all required fields before submitting.
- If range values don’t show correctly: Verify the Step value and ensure it fits evenly between the start and end of your range.
For further details or to request upload assistance, please contact us via helprequest@scopematch.com